|
Fly of
the Month
Bob Ireton brings together his
experience in fly fishing, aquatic entomology, and knowledge of fly
tying techniques and materials, to design and tie durable and
effective flies.
|
|

Volume 6, Issue 10
October 2005
GLO MINNOW
Fly, Text, and Photography by Bob Ireton
We are starting to see
new fly tying materials on a regular basis. One of these materials is
UNI Glo Yarn. After being exposed to a good light source, it actually
glows in the dark! Think of the possibilities! Sometimes we are fishing
at dawn or dusk, or even at night. The water can be a little off color
after a rain. And as the depth of water increases, the amount of light
decreases. You may be thinking of other possibilities, also. I have
utilized this great new material to tie a minnow fly. I’m sure you will
have other patterns in mind, like Clouser Minnows, Woolly Buggers, etc.
MATERIALS
Hook – Daiichi
1720, Dai-Riki 710, Mustad 9672, Orvis 1526, TMC 5263, or equivalent.
Size – 6-16.
Thread – White, 6/0 or 8/0.
Weight – Lead wire.
Eyes – Lead barbell.
Tail – White UNI Glo Yarn.
Ribbing – Pearl oval tinsel.
Body - White UNI Glo Yarn.
TYING STEPS - click on
pictures for larger view
|
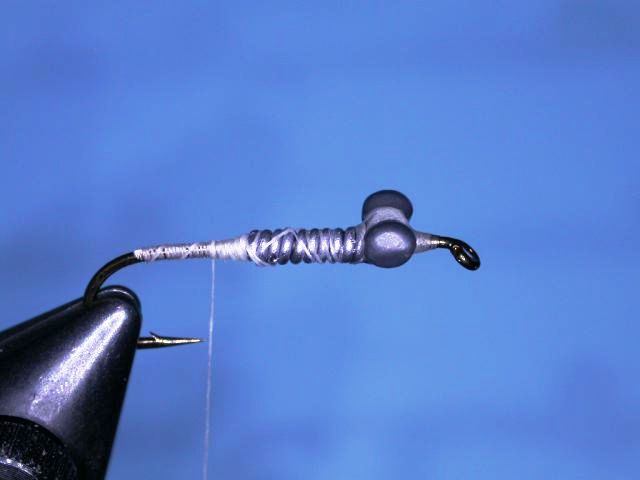
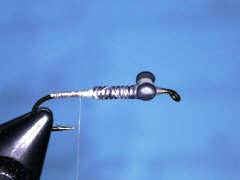
1 – Mash down barb, if desired. I am
using a Daiichi 1720, size 10 for this fly. Place the hook properly in
the vise. Attach the working thread behind the hook eye, and lay on a
good thread base. Stop above the barb, and tie a half hitch. Wrap some
lead wire around the hook shank, leaving space for the eyes. Mount the
eyes above the shank, against the lead wraps. Secure the eyes with
figure eight wraps. Dab some super glue top and bottom on the thread
holding the eyes. |
 |
|
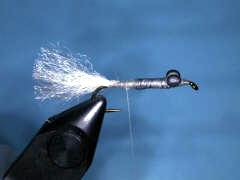
2 – Wrap thread to cover the lead,
forming a ramp on each end. Coat the thread wrapped lead with Dave’s
Flexament. Cut enough Glo Yarn to form a tail four pieces thick of the
yarn, and the length of the hook shank. Tie this in above the barb. Tie
a half hitch. |
 |
|
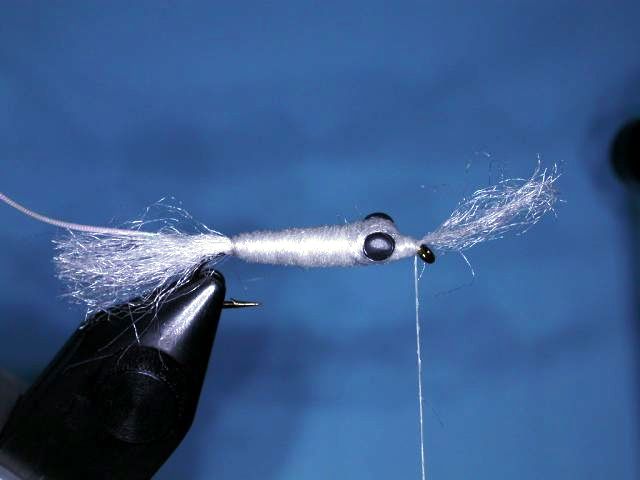
3 – Now tie in
the materials for the ribbing, and the body. A material holder helps
here. Tie a half hitch. |
 |
|
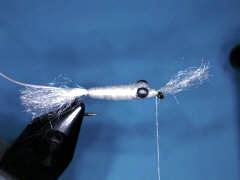
4 – Bring the thread forward, and tie
a half hitch behind the hook eye. This step is necessary if you will be
using a rotary vise for the next part. Palmer the Glo Yarn forward,
building a tapered body. Wrap the yarn around the eyes also. Tie off the
yarn, leaving a piece on the tag end. Cut off excess yarn, and tie a
half hitch. |
 |
|
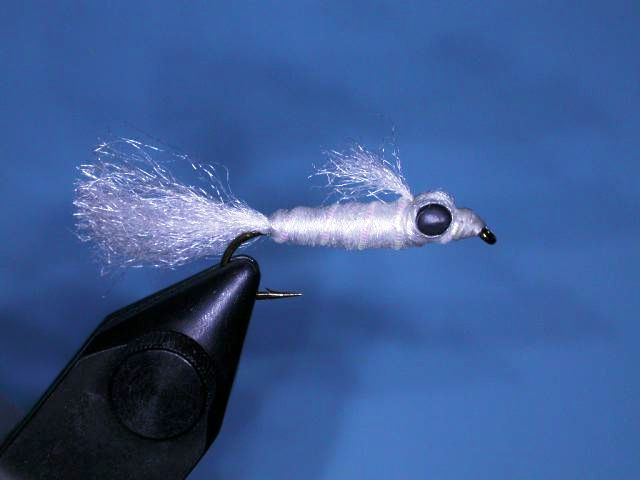
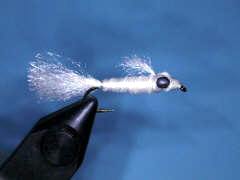
5 – Now palmer the rib forward, and
tie off. Cut and remove the excess ribbing. Fold the tag end of the yarn
over the shank, between the eyes, and secure with the thread. Bring the
thread forward of the eyes, and form a ‘nose’. Tie a half hitch against
the front of the eyes, then a whip finish forward towards the hook eye.
Cut off and remove the working thread. |
 |
|
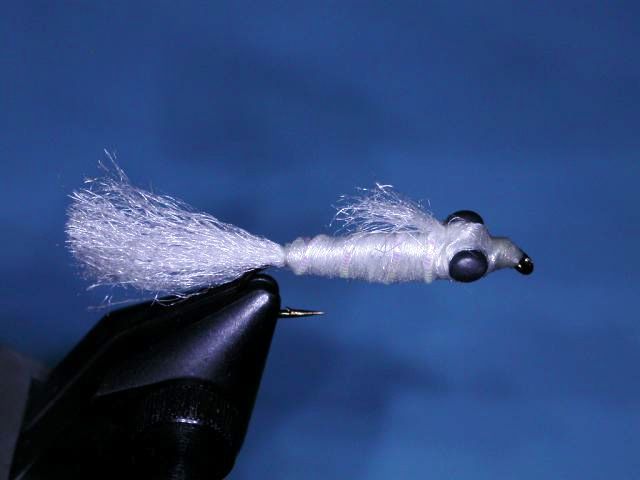
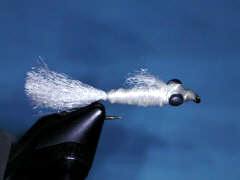
6
– Put
some head cement on the ‘nose’ of the fly. Using a pair of pliers with
smooth, flat jaws, vertically flatten the body behind the eyes. This fly
looks a little ‘different’as we see it in the vise. But the lead barbell
eyes on top of the hook shank will cause the fly to ride ‘hook up’ in
the water. Does it look better now |
 |
© 2005 Robert R. Ireton, II
www.buckeyeflyfishers.com
Site designed and maintained by
Panfalone@fuse.net
|